Networking: Map Network Drives
Networking: Map Network Drives
If you have issues adding the P: drive or any drive to your computer, follow this guide.
Drives are mapped automatically by Group Policy; when you log into your computer, the drives should automatically map.
How to refresh group policy to map drives:
- Click Start (Windows icon)
- Type CMD and press Enter
- In the black DOS window, type:
- gpupdate /force
- Press Enter
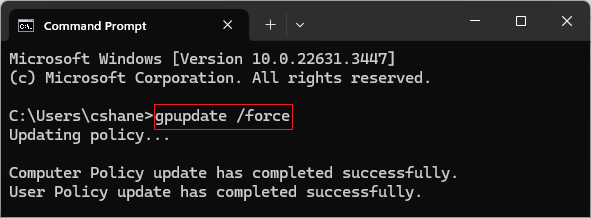
This will update both computer and user policies which should map your drives.
NOTE: If you get a message stating to enter the user name and password, you will need to use the following steps.
NOTE: If you get a message stating to enter the user name and password, you will need to use the following steps.
Disconnect Network Drives
Sometimes there might be an error that states that the device name is already in use, however, you cannot access it. Or perhaps you have changed your password remotely and it hasn't updated for the existing drives.
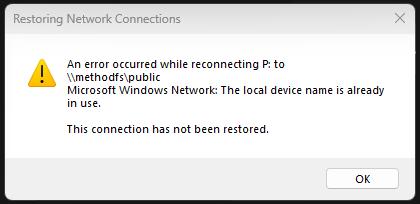
In this instance, you must Disconnect the drive.
- Right-click the Start button and select File Explorer (or press Windows+E)
- Expand out This PC
- Right-click the specified drive
- Click Disconnect network drive…
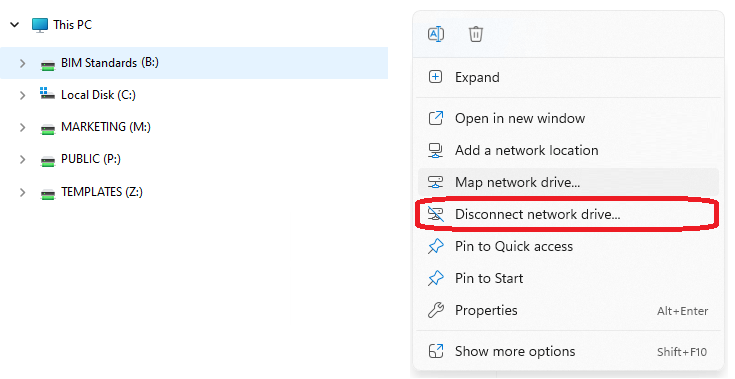
This will remove the drive, and then you try and map by group policy or manually mapping the network drive.
Manually Mapping Network Drives
Open Windows File Explorer
- Right-click the Start button and select File Explorer (or press Windows+E)
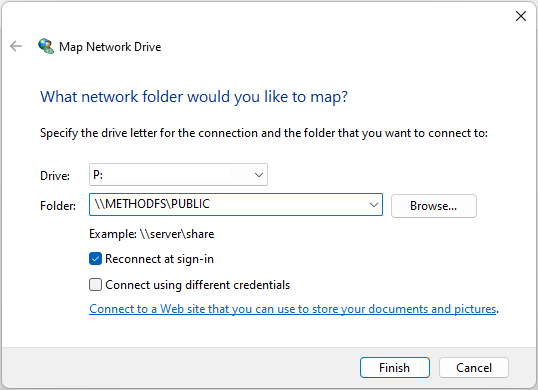
- In File Explorer, right-click This PC and select “Map network drive“
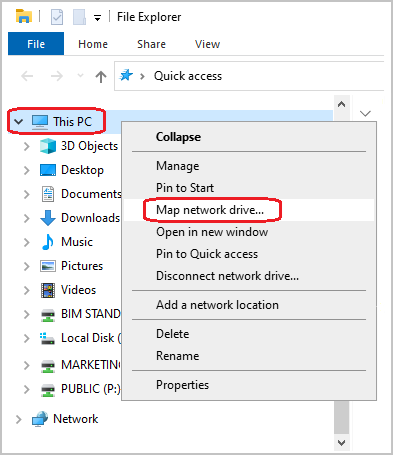
- A dialogue box will appear for you to enter the network drive letter.
Example: P:
- In the folder section, you will enter two backslashes “\\”, the server name, another backslash “\” and the folder name.
Example: - For the B: drive \\METHODFS4\BIM STANDARDS
- For the M: drive \\METHODFS3\MARKETING
- For the P: drive \\METHODFS\PUBLIC
- For the R: drive \\METHODFS2\TEMPLES
- For the Z: drive \\METHODFS4\TEMPLATES
- For the O: drive \\METHODFS4\OPERATIONS
- For the U: drive \\METHODARCHIVE\ARCHIVES
- For the S: drive \\METHODAS\ADMINISTRATION
- By default, the “reconnect at sign-in” button is set to on. If it isn't, please check the box.
NOTE: This does not guarantee permission to all folders; some folders are restricted by security groups. If you need assistance with access, please submit a ticket to IT.
If you have any issues connecting to drives, please contact IT.
Related Articles
VPN: Understanding Virtual Private Networks (VPN)
VPN: Understanding Virtual Private Networks (VPN) VPN or Virtual Private Network - What is it? What does it do? Understanding Virtual Private Networks is key to safeguarding your information. VPN stands for Virtual Private Network. It's a service ...RDP: Connecting to a remote computer and customizing connection options
RDP: Connecting to a remote computer and customizing connection options How to use Remote Desktop Connection or RDP (Remote Desktop Protocol) to connect to a computer in the office. Whether you are connecting from a remote machine, or laptop in the ...RDP: Troubleshooting Remote Desktop Connection issues
RDP: Troubleshooting Remote Desktop Connection issues Remote Desktop Connection Immediately Disconnects: Known issue with Windows 10 If you are already signed in on a computer and then try to remote to the same computer without signing out, you will ...VPN: Installing & Setting up Barracuda for remote connection (Windows & MacOS)
VPN: Installing & Setting up Barracuda for remote connection (Windows & MacOS) Installing the Barracuda VPN Network Access Client On the computer you will be using to remote into the office, download and install the Barracuda Network Access Client. ...VPN: Troubleshooting Barracuda VPN Client
VPN: Troubleshooting Barracuda VPN Client Here are some troubleshooting steps to take if the VPN isn't connecting. Credentials: Your username should be your first initial last name. The password will be your computer password (not email). Your ...