VPN: Installing & Setting up Barracuda for remote connection (Windows & MacOS)
VPN: Installing & Setting up Barracuda for remote connection (Windows & MacOS)
Installing the Barracuda VPN Network Access Client
- On the computer you will be using to remote into the office, download and install the Barracuda Network Access Client.
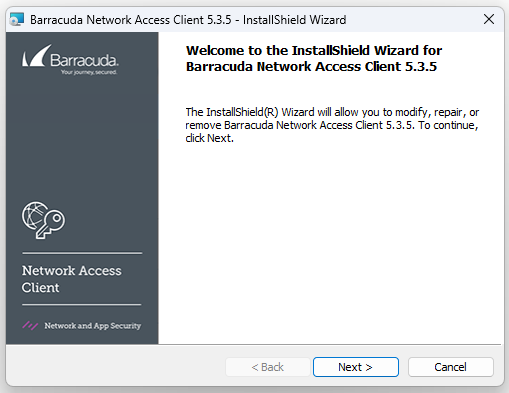
- In the install wizard, click Next.
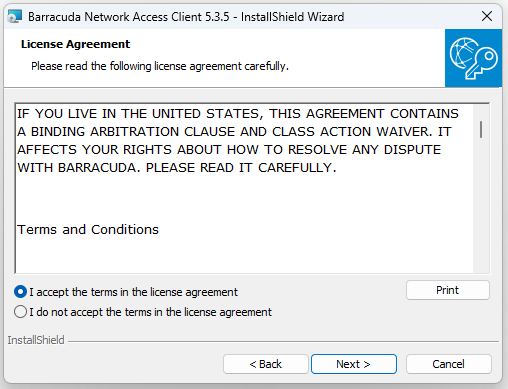
- Accept the License Agreement.
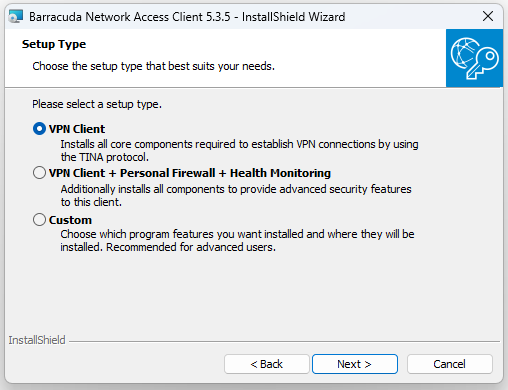
- Setup Type - Leave the default VPN Client, and click Next.
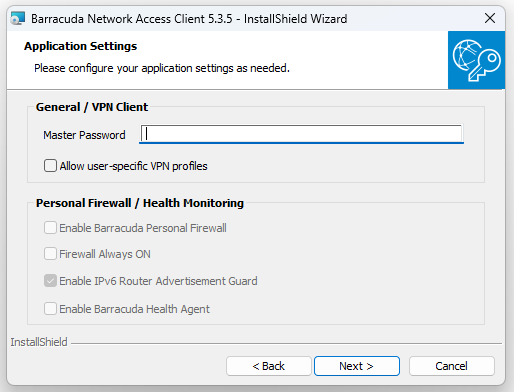
- It will prompt for a Master Password - DO NOT enter anything in this field, just click Next.
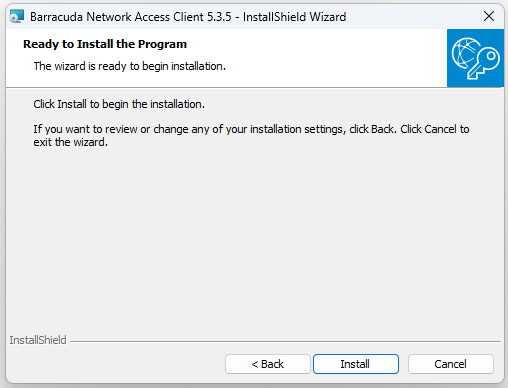
- Click Install.
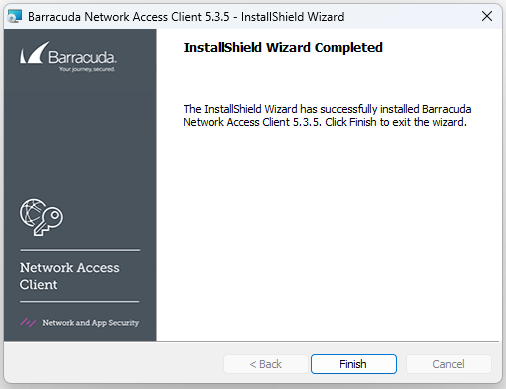
- Click Finish.
- Restart the computer.
Setting up the VPN Profile
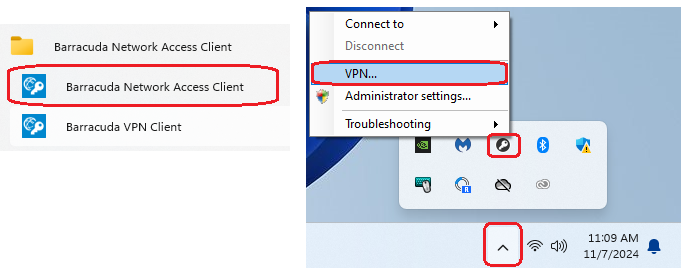
- Launch the Barracuda Network Access Client, you can find it in your list of programs from the Start button's All Apps. Alternatively, you will find it in Systems Tray; click the UP caret, right-click on the Key icon, and select VPN.
- Click the New Profile in the top left and select machine
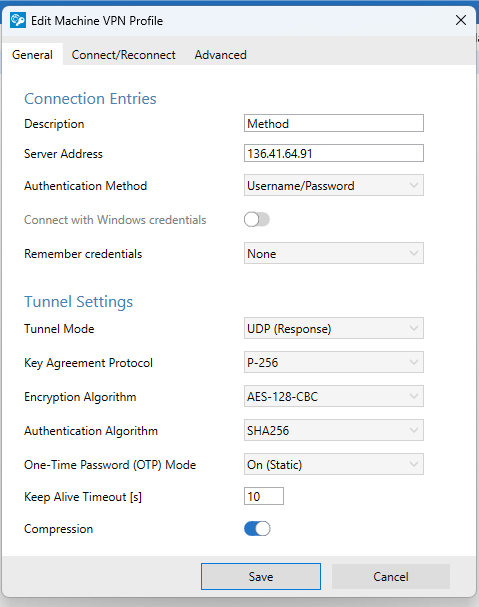
- In the description type Method
- In the server address type 136.41.64.91
- The Authentication Method should be set to Username/Password
- Set the "One-Time Password Mode" to Static
- Click Save
- This is what it should look like:
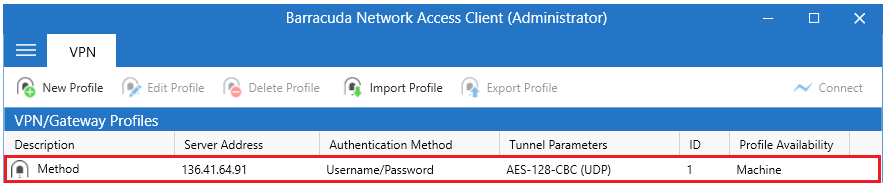
- The Network Access Client will show the new profile, which looks like this:
Connecting to the VPN
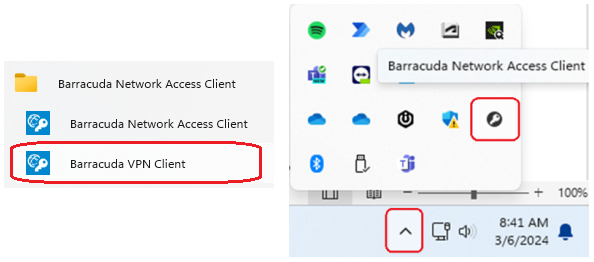
- Launch the VPN client, you can find it in your list of programs from the Start button's All Apps. Alternatively, you will find it in Systems Tray; click the UP caret, and double-left-click on the Key icon.
-
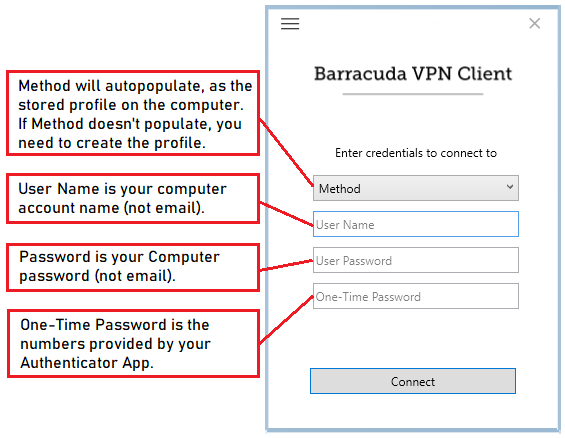
The Method profile should already be populated.
Enter your User Name, this is your Windows Computer account name.
Enter your Windows Computer Password.
Enter the One-Time Password (OTP), this password consists of the numbers generated on your Authenticator App on your phone. The numbers will change every 30 seconds.
This is what your VPN client will look like when you launch it:
Troubleshooting:
You may run into an issue where you are connected but cannot access drives, connect to remote computers, or ping network resources. In this instance, try disconnecting and reconnecting the VPN. If that doesn't work, try restarting your computer.
You may run into an issue where you are connected but cannot access drives, connect to remote computers, or ping network resources. In this instance, try disconnecting and reconnecting the VPN. If that doesn't work, try restarting your computer.
For MacOS
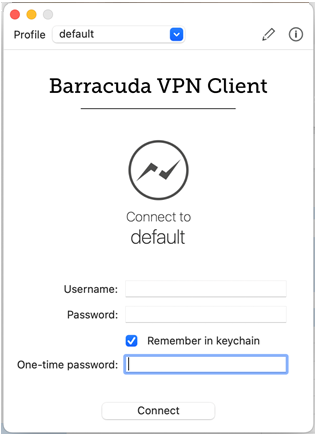
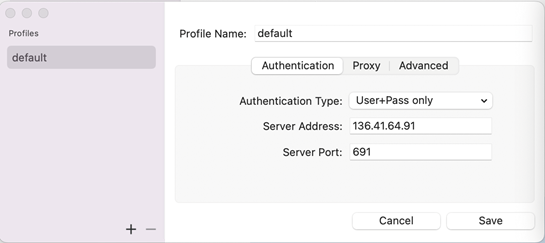
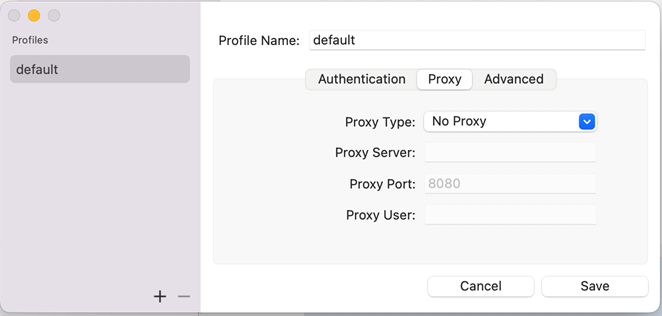
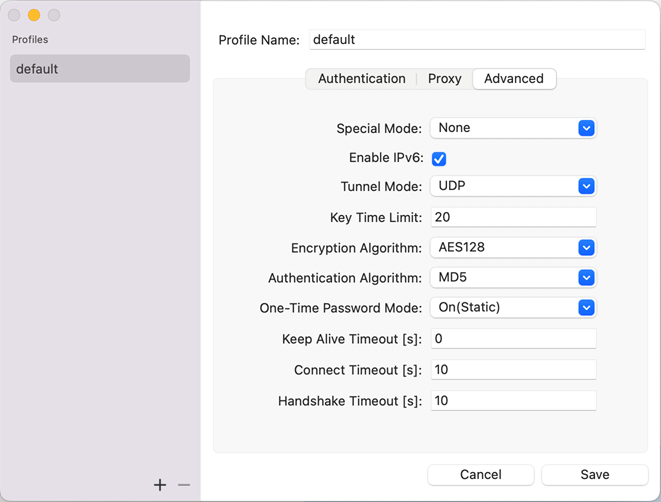
MacOS Barracuda Network Client